

Lead Magnet Setup Guide
Last updated February 14, 2026
Creators use lead magnets during live events or online forms to capture audience information. This data is used to initiate a sales funnel. The Lead Magnet could be a free workbook, free course or tips.
Lead Magnet Setup Guide
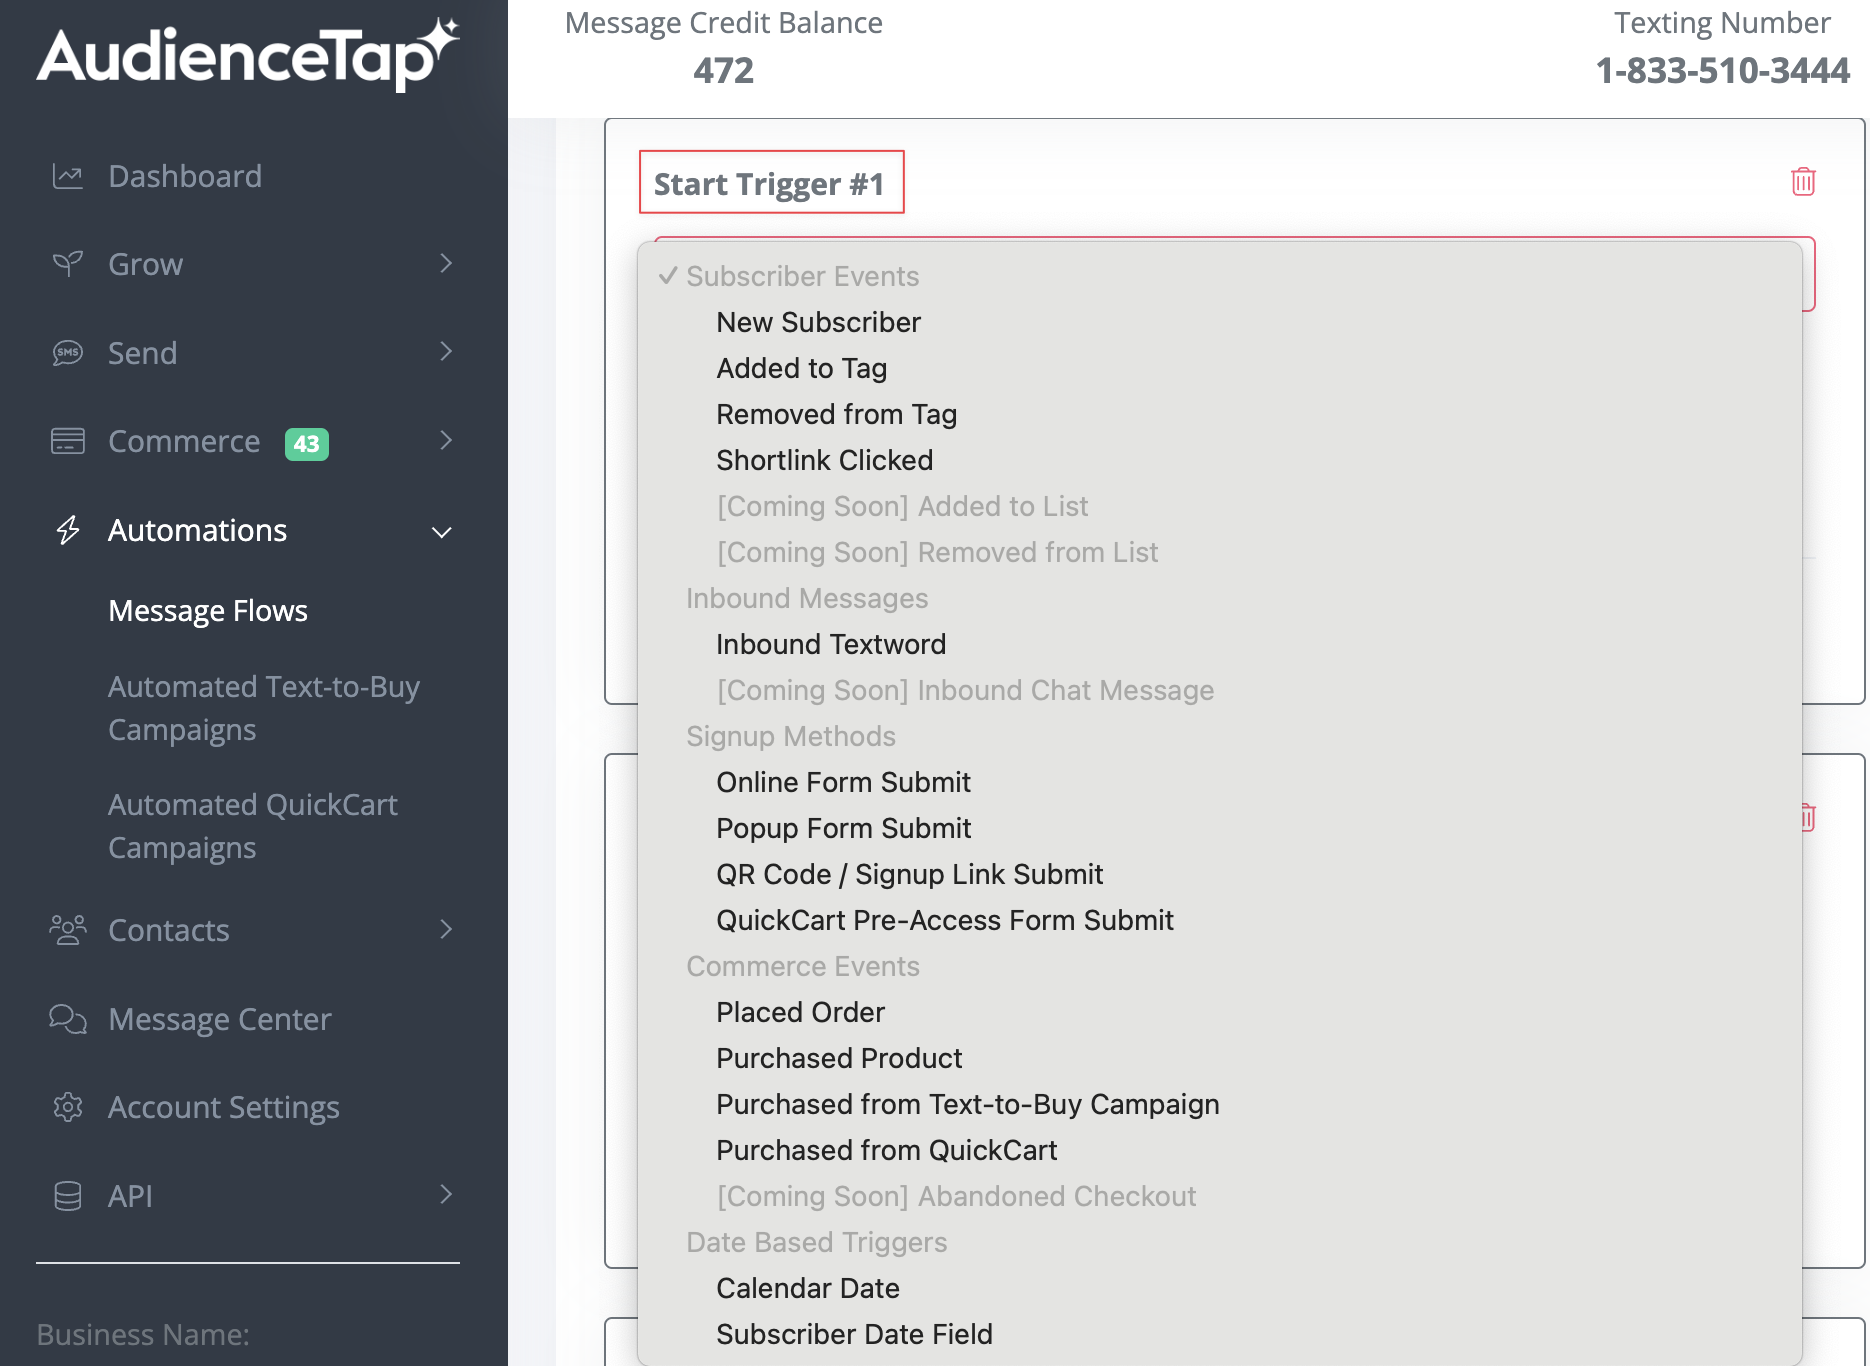
- Navigate to Automations
- Message Flows - Create new Flow
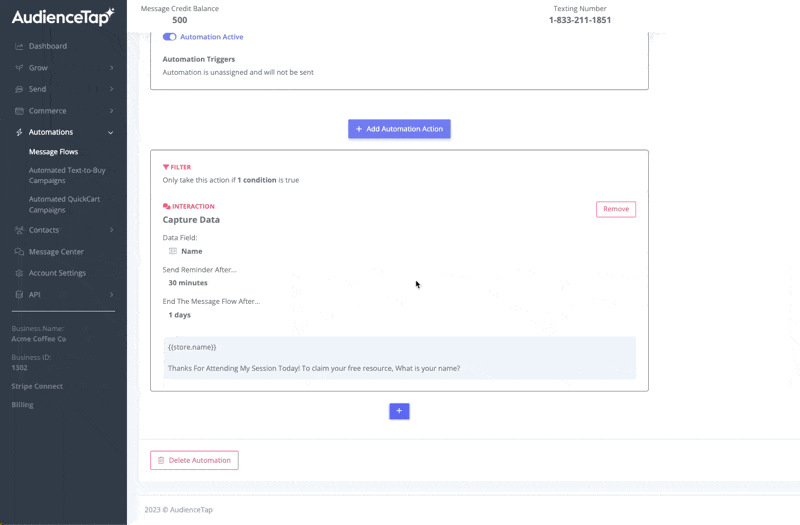
- Add Data Capture Automation Action
- Capture Name, if name was already captured through an Online Form add condition filter to state, "Only take this action if [First Name] is [Blank].
- Capture email - in this text ask for email address but also share in the text field that you will deliver them the free resource via email and be on the look out for it.
- Send Email Automation Action.
- Add email action and create a compelling email with the free resource within the email.
- Add Delays to make a drip sequence
- Could be minutes or delays before the final action of your message flow
- Generate revenue
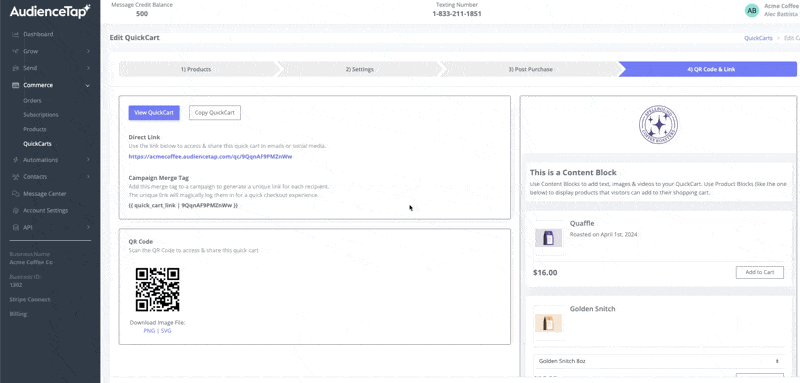
- Send a final text highlighting a message saying something "Today Only, 10% Off" and add your Quick Cart Merge tag which hosts the resources you wish to sell.
- Merge Tags for Quick Carts can be found in the Commerce > Quick Carts > Select Quick Cart > QR Code & Link Section.
- Add Your Lead Magnet Flow to the respected start triggers at the top of the message flows (QR Codes, TextWords, & Online Forms).