


Message Flow Setup Guide
Last updated February 14, 2026
A series of messages or actions tied together into a flow which allows merchants or creators to create automated experiences triggered by Subscriber Sign Up Methods like, QR-Codes, Textwords, and Online Forms. They can also be triggered from Inbound TextWords, adding/removing tags, Calendar dates, Subscriber attributes & activities.
You can also manually send Message flows in the Send > Message Flow Section.
Message Flow Setup Guide
- Navigate to Automations
- Message Flows
- Create a new Message Flow:
- Name the automation flow.
- Add Actions.
- Click "Add an Action" to see available action
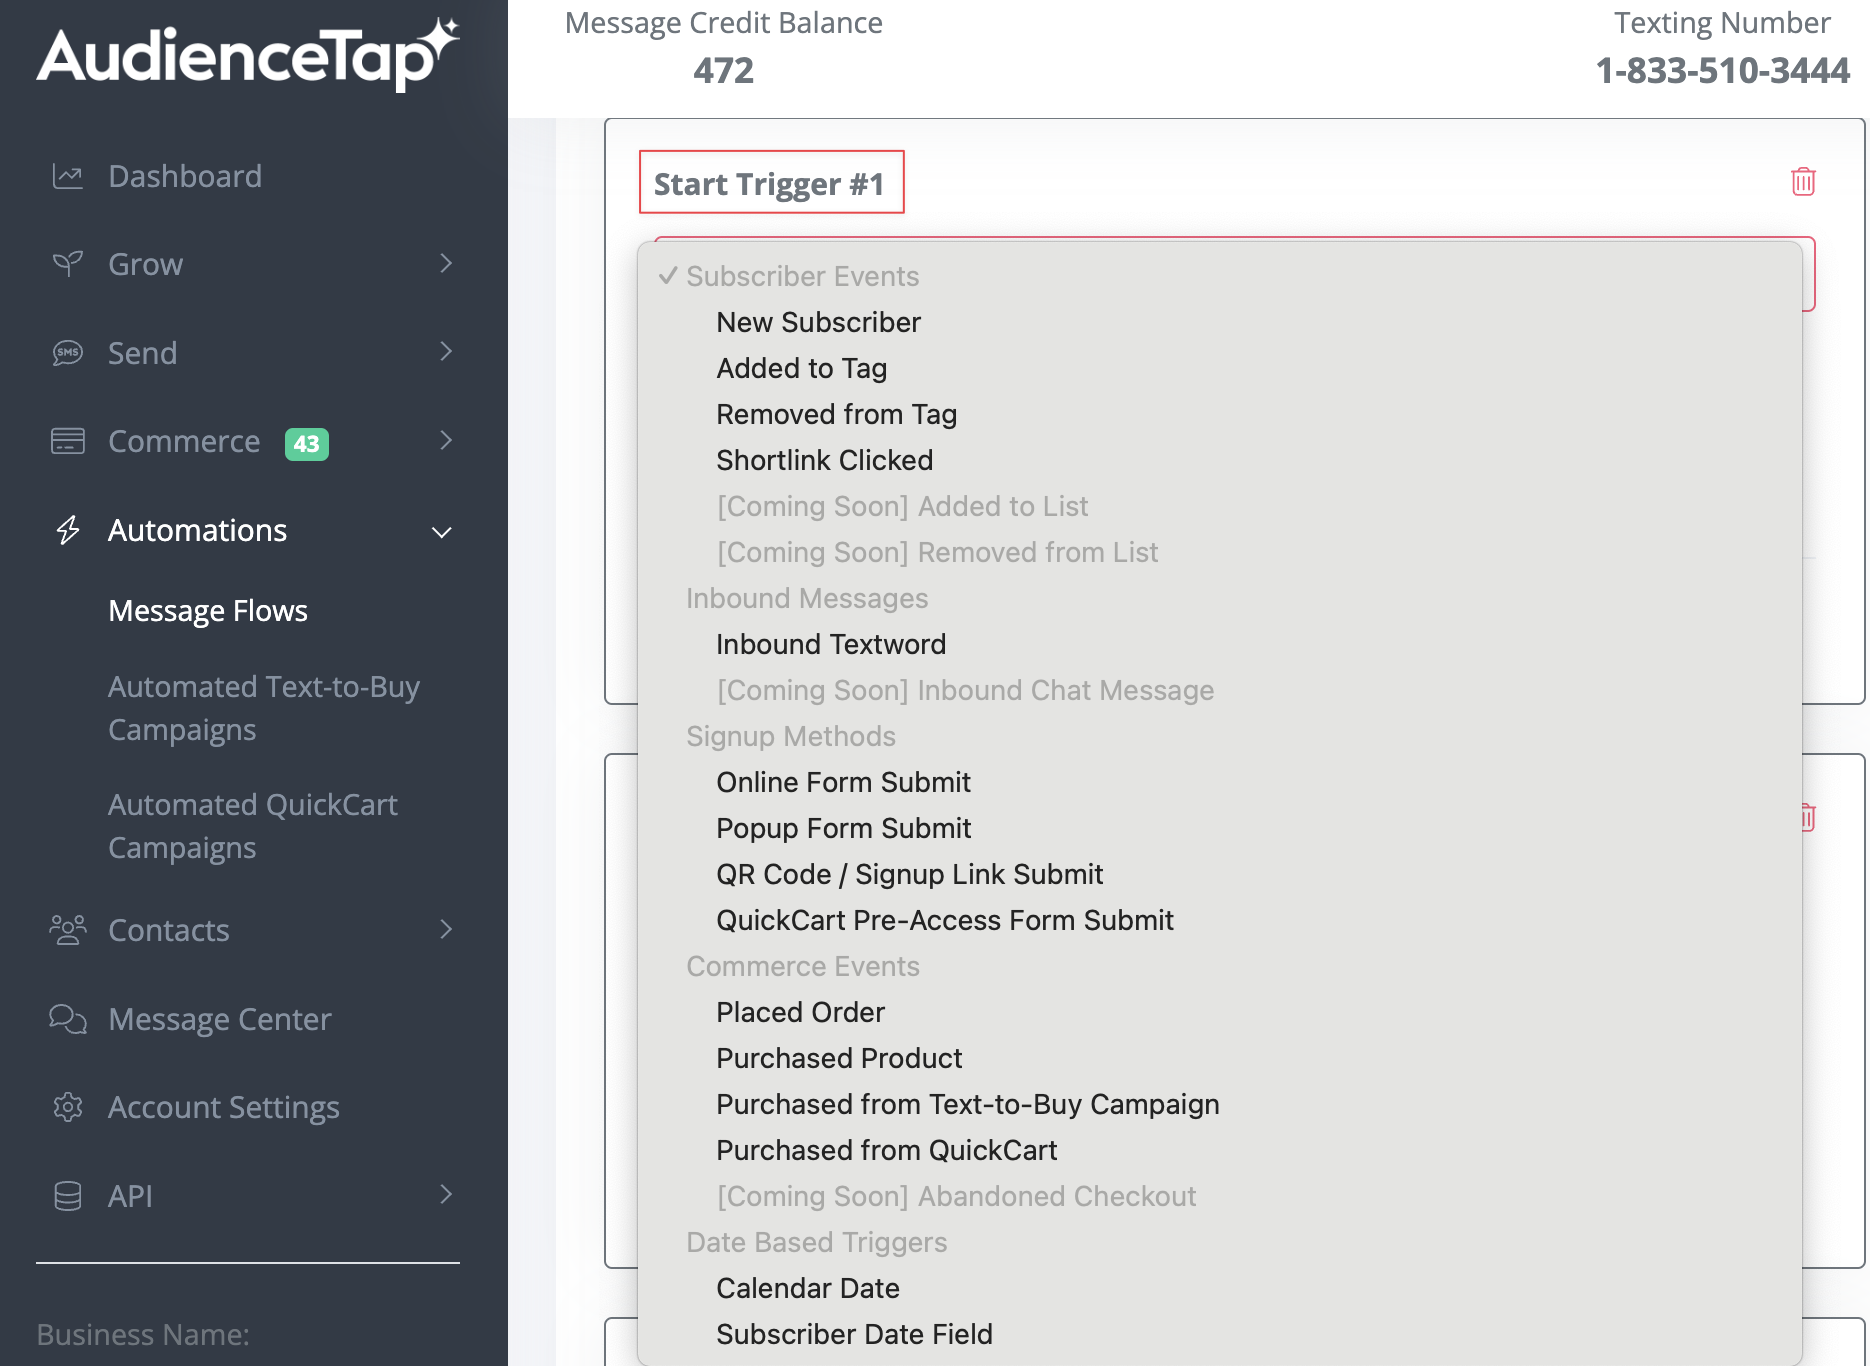
Start Triggers
Add a start trigger to your message flow. You can have multiple start triggers for a single message flow and this tells the software what action is needed to kickoff the Automation.
Overview of Actions
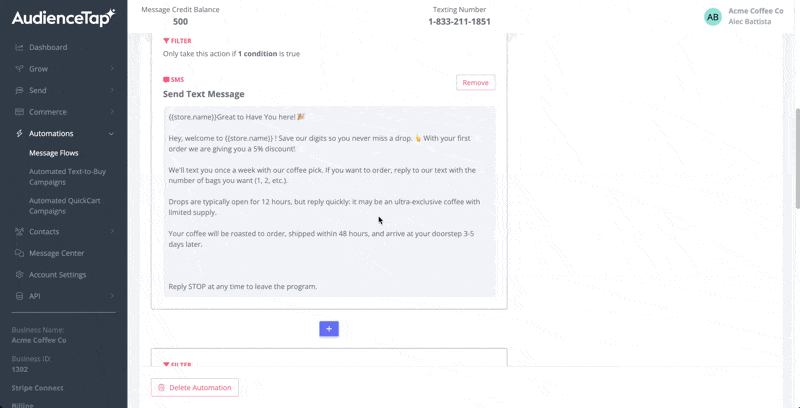
- Send a Text Message: Sends a simple text message.
- Send a Contact Card: Adds a contact card to a text message.
- Data Capture by Text: Captures information like name, email, or custom fields via text.
- Send an Email : Sends a lightweight email with plain text or simple formatting.
- Send a Notification Email: Notifies the merchant when a certain point in the automation is reached.
- Delays : Adds delays between steps to create drip sequences.
- Add/Remove Tags: Tags contacts based on their interactions.
- Add Coupons/Credits: Issues coupons or adds credits to customer profiles.

Filtering
Define conditions for actions to fire (e.g., send a coupon only if the user came from a specific source or is not a customer)
- Interactive Surveys: Use Custom Field Surveys to capture user responses and data.
- Sync with MailChimp: Sync captured emails with MailChimp lists for more robust email campaigns.